An important aspect in learning how to draw is perspective, which can be difficult. Once you understand this essential art fundamental topic, you will be able to orient objects realistically in space.
This skill helps in creating realistic/fitting backgrounds also, since understanding perspective will help you position and scale your foreground/midground/background.
Even for single subject focused pieces, a knowledge of perspective helps you with foreshortening at different angles.
Having perspective down will help you be a more flexible artist and not necessarily need to rely on a reference for sizing different subjects in your work.
An overview of artistic perspective
There are three main types to be aware of! Named simply, one point, two point, and three point lol.
The points refer to vanishing points, really places of focus where the horizon fades from view. Though the picture I have below is a bit easier to visualize, it’s basically the convergence point of the parallel lines in 3D space, if you were to apply a grid to the world.
Once you understand how these perspective grids work, you won’t have to measure out things or copy from a photo; you can design scenes in your mind! You can also move stuff and it won’t look weird because you will see how things appear to be different sized depending how they move away from vanishing point/focal points.
Keep in mind that things farther away generally look smaller and things that are closer generally look larger to you.
When practicing, definitely try drawing in a few boxes or objects to see if you can apply this perspective.
One Point Perspective
Here we have one point perspective, only one vanishing point.
Draw in that horizon line first and then place your vanishing point to wherever you want on that horizon line.
Now radiate guidelines from that center point stretching out. You can go as far out as you need to visualize the perspective.
In real life, imagine a road vanishing off into the distance (like those motivational posters!).

Two Point Perspective
And now we have two vanishing points on the horizon!
Place down your horizon line & then place two points, perferably not too too close to each other (though you could go close, if you wish!).
Now radiate some nice lines out. When you draw some stuff, you are going to want to pay attention to where those mini grids you just drew intersect.
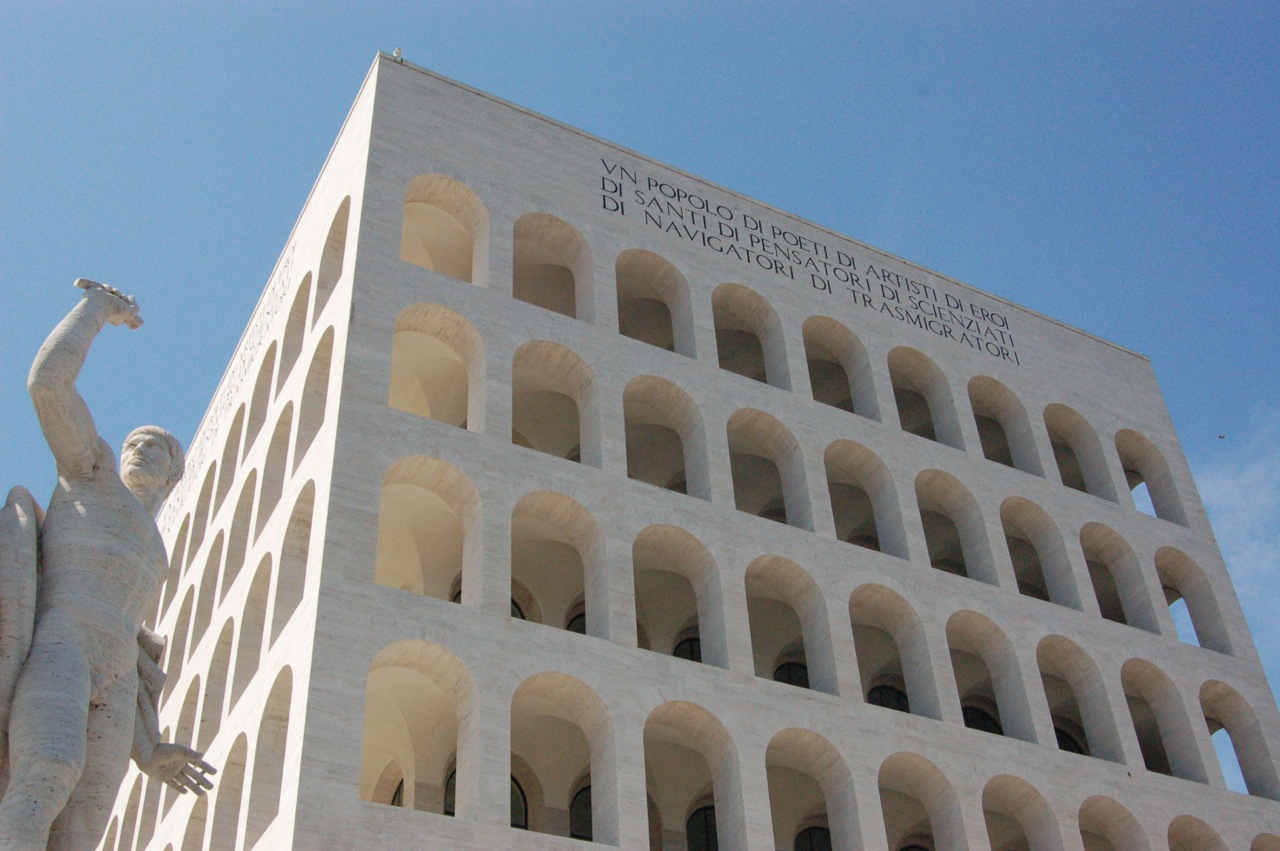
In real life, you often can see this perspective exemplified from photographs of buildings.

Three Point Perspective
Quite similar to two point perspective but consider a third vanishing point above or below the horizon, which results in rather dramatic two views: bird’s eye & “worm’s” view.
Again, be sure to pay attention to the intersection points of these three radiating line grids.
In real life, those scenic drone pics / looking from the ground up are solid examples.

How to apply perspective
Here are a few examples of perspective in action. The objects I chose are based off a tumblr question!


I’m trying to move off Amazon Affiliates, so I made a premium version of this as a PSD file with all the layers so you can toggle them on and off as you please: https://bmc.xyz/l/perspective.
Here is a pic of the layer groups:

Tools for perspective practice
Traditional
If you are going traditional, a ruler might come in handy, though free hand lining is probably good enough. When you are learning this for the first time, consider going for a ruler though. I would go lightish with the lines so you can practice drawing other objects in perspective.
Or use pencil for the grid lines and then a pen for the boxes/objects you are trying to practice.
Once you get the hang of things, you might be able to imagine most of the grids and not draw in every line. This will help you keep your page clearner.
Digital
You have a lot of options here, which rocks. Layers + opacity adjustments are super helpful for practicing.
Krita, a free and open source art program, has plenty of amazing tools for artists. Since it’s free and accessible to everyone, I want to highlight and demo its perspective tool.
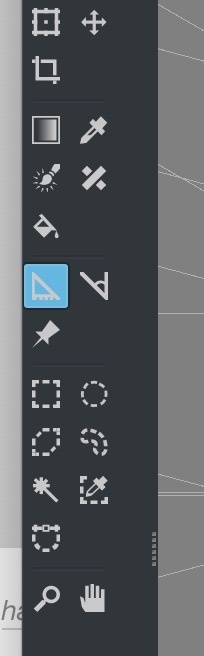
It’s called the Assistant Tool (see the Krita docs to read more about it) and can be found in the sidebar. It looks like a triangular ruler thing and is highlighted in the pic below.
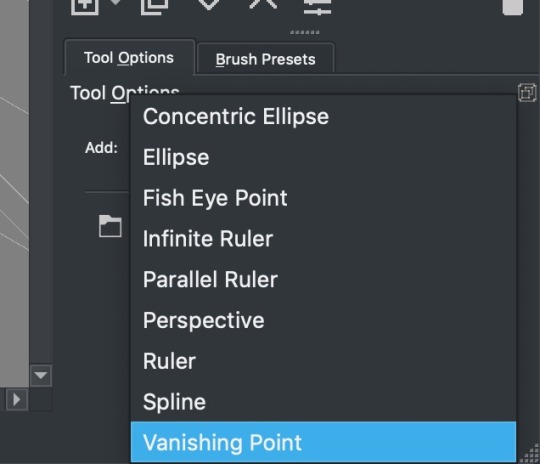
Now you can go to the window/panel where the setting are and adjust tons of things. However, for this demo, I will be showing you the vanishing points.
This thing is truly lovely!
I hope you enjoy this quick, sped up video demo of the tool in action:
Further Reading
Here are a few favorites on this topic, which can be pretty tricky!
Having more than one view point is helpful for learning this kind of thing ;)
Here are a few favorites:
- New perspective on perspective by HOON
- Perspective Tutorial by Kinie
- https://drawabox.com/lesson/1 -Boxes! Not exactly related to perspective, but will get you comfortable orienting shapes in space, which is needed for drawing things in perspective.
- @rawranansi/ @thundercluck-blog‘s amazing tutorial: https://thundercluck-blog.tumblr.com/post/158689805952/hey-friends-its-meg-for-this-weeks-tutor.
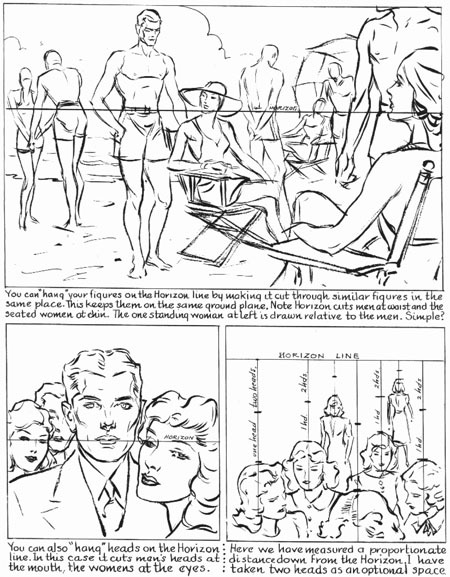
For aligning people with a horizon, consider this handy advice from the legendary Andrew Loomis. His books are in the public domain, like Figure Drawing For All It’s Worth
Other articles on art fundamentals
Please consider checking out my guides to color theory and anatomy.
And browse more Guides & Masterposts